January 11, 2023
In this article, we’ll let you know how to enable PXE boot on startup on your Handheld Algiz 8X tablet.
PXE (Pre Execution Environment) is a method of having an end computer (client) boot using only its network card. PXE is a relatively simple protocol that was developed by Intel and other vendors as part of the Wired for Management initiative. PXE is derived from Dynamic Host Configuration Protocol (DHCP), itself derived from BootP, and is typically implemented in your Network Interface Card (NIC).
Requirements for updating BIOS
- 2 GB Thumb Drive
- USB Keyboard
- Your Handheld tablet needs to be at the latest standard BIOS release for PXE boot to be enabled.
The AutoPowerOn version of the BIOS does not support PXE Boot on the Algiz 8X tablet. Download the latest standard BIOS here.
Requirements for using PXE boot
- USB Keyboard
- In order to utilize the PXE boot feature on the Algiz 8X, you will need either an Algiz 8X Desktop Cradle or an Algiz 8X RJ45 Expansion Module.
- Using a USB 3.0 or USB 2.0 to Network Adapter will not work on the Algiz 8X. Either of the two above methods is required for PXE image deployment.
Solution
After ensuring that you are running the latest BIOS as described above, to enable PXE boot on your Algiz 8X device, please perform the following steps:
- Plug your USB keyboard in.
- Power on the Handheld tablet.
- When the Handheld logo appears, tap the Esc key to enter the BIOS.
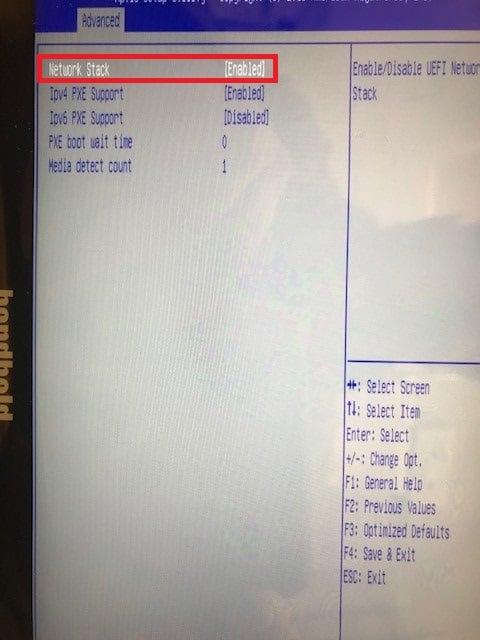
- Tab over to the Advanced Tab.
- Arrow down to Network stack and press Enter.
- Select Network Stack and select Enable.

- Navigate to the Save & Exit tab and select Save Changes & Exit.
- Power the Algiz 8X on again.
- When the Handheld Logo appears, select Esc to enter the BIOS.
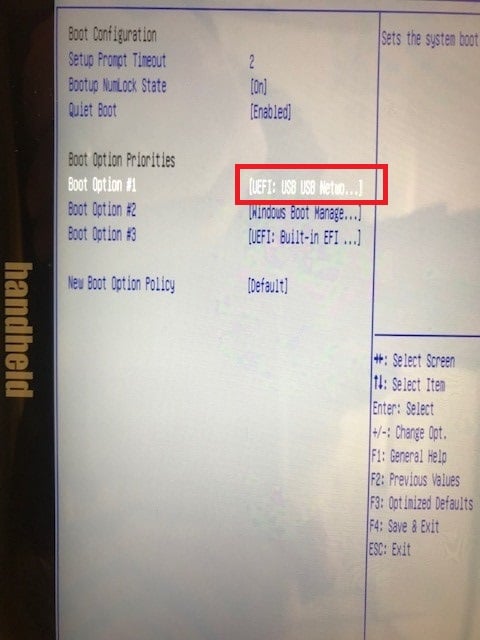
- Navigate to the Boot Tab. Scroll down to Boot Option #1 end press Enter.

- Choose USB Network Card & press enter on your keyboard.
- Navigate to the Save & Exit tab and select Save Changes & Exit.
