April 14, 2023
Getting started
- Download the EZConfig tool from here and install the tool.
- Open the tool using the EZConfig-Scanning v4_IE entry from your start menu.
- At the bottom of the window, click Allow blocked content.
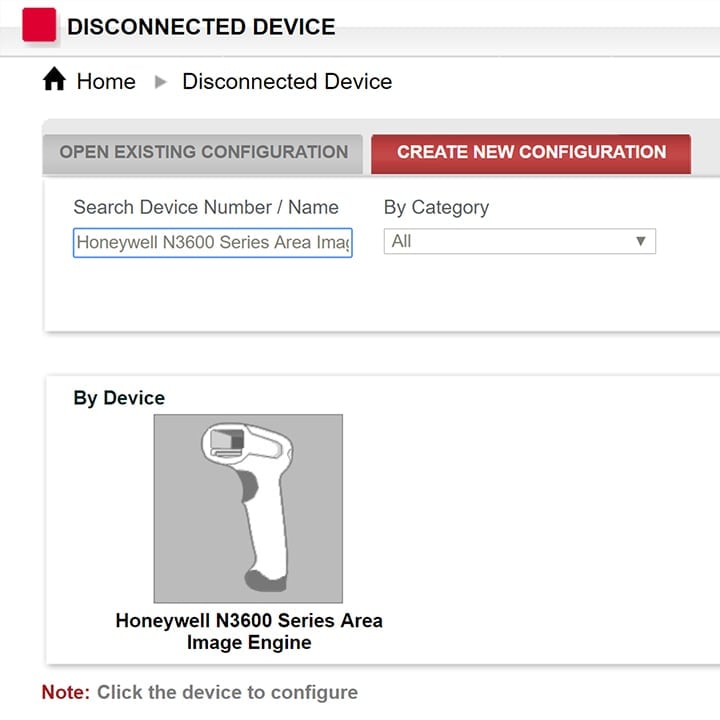
- Select Disconnected Device in the left side menu.
- In the “Search Device Number/Name” box look for “N3600” and select “Honeywell N3600
- Series Area Image Engine” then click on the image in the “By Device” bar.
Barcode generation setup
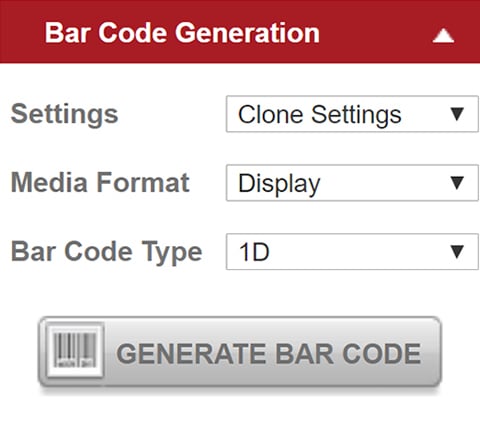
Settings
- Changed Settings: Only generate codes for settings that have changed from default.
- Selected Settings: Only generate code for changes selected in the “Configuration History” pane.
- Clone Settings: Reset the unit to factory defaults (USB Serial according to the website), and create generate codes for changed settings.
Media Format
- Display: Create the configuration barcode(s) in the web browser.
- Print: Create the configuration barcodes(s) in the web browser and automatically send them to the printer.
Bar Code Type
- 1D: Creates a series of 1D barcodes, one for each setting.
- 2D: Creates a single 2D barcode for all settings.
Key Settings
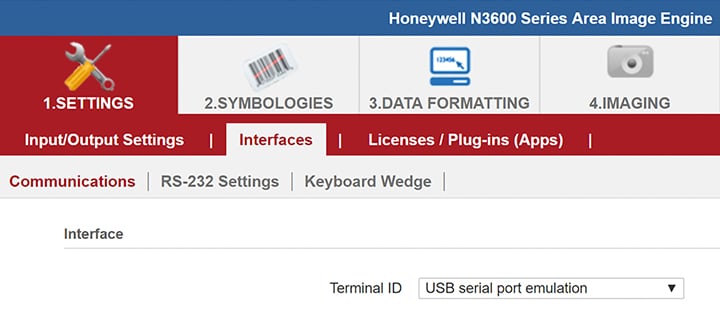
1. Settings->Interfaces->Communications: Terminal ID
- USB serial port emulation: Needed for SDK support, the default mode for the scanner.
- USB HID Keyboard PC: Setups the scanner as a keyboard, will automatically append a CR to the end of the scanned data.
2. Symbologies: This section controls what symbologies are recognized by the reader.
3. Data Formatting -> Prefix/Suffix
Used to add simple prefix and/or suffix do the scanned data.
Simple on-off toggles (On by default)
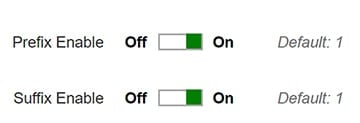
Setting “Suffix Enable” to “Off” will turn off the default CR when scanning in keyboard mode.
To define a prefix and/or suffix, click on the desired Editor button and enter in the desired text. Use the Insert ASCII or Insert Keypress to add special characters to the prefix/suffix.

4. Advanced formatting
Data Formatting Settings:
Data Format Required – Keep Prefix/Suffix – Not supported
Data Formatter Off – Turns off Data Formatter rules
Data Formatter On – Not Required – Keep Prefix/Suffix: Turns on Data Formatter rules
The Data Formatter exposes many advanced features to customize the output of the scanner. It is a very powerful tool and we will only cover a few use cases here.
Please note that the prefix/suffix is always added after the Data Formatter rules have been applied.
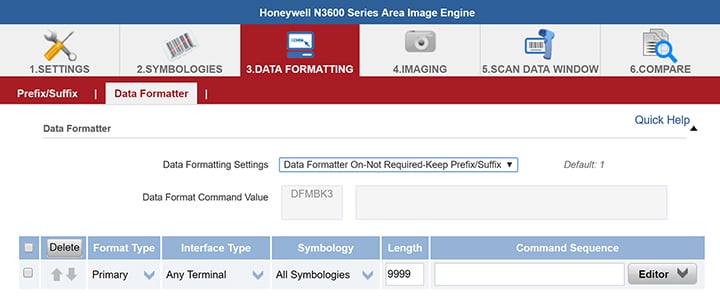
Clicking on Editor opens up Data Formatter builder. From here you can pick from a number of Commands and Sub-Commands to build up a set of rules to format the output data. Once your set of rules have been created, click Finish to save the rules.
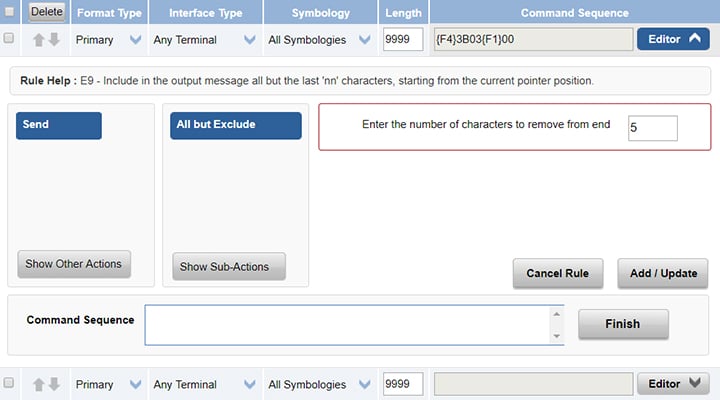
SAMPLE RULE 1: Trim Right 5 Characters
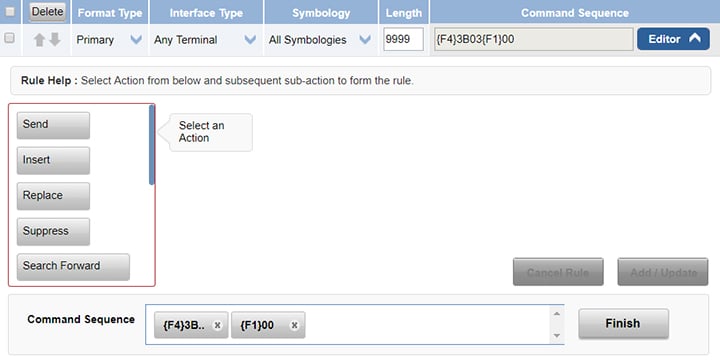
This simple one-command script will trim the last 5 characters from the scanned data. From the point shown above, click Add/Update then Finish to set up this rule.
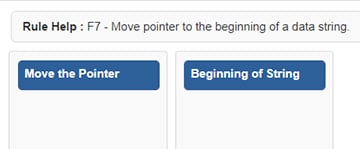
SAMPLE RULE 2: Trim Left 4 Characters
First, add a rule to move the pointer to the start of the read in data.
Then move the pointer forward 4 characters.

Then send everything else in the buffer.

This is how the final Command Sequence should look.
